Classroom Redesign
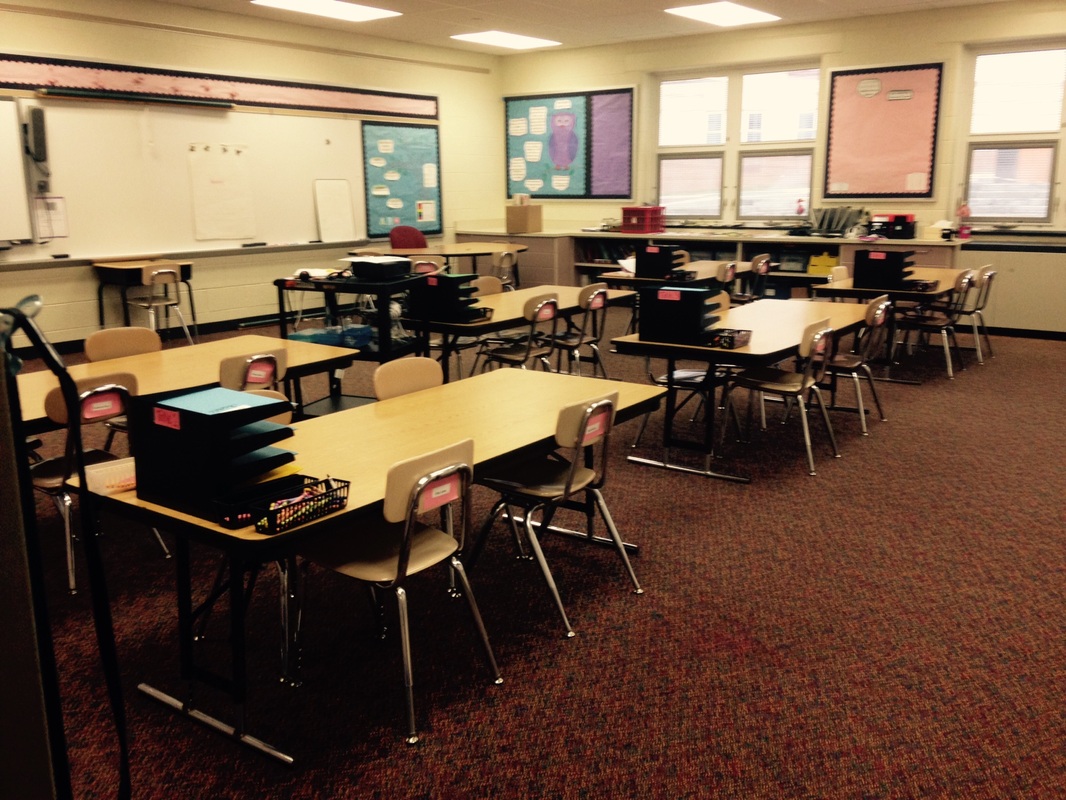
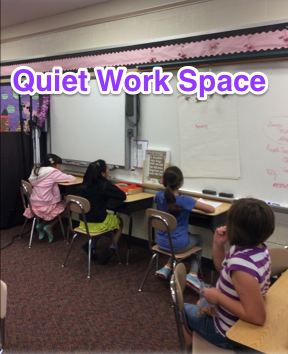
The picture below shows the way the classroom was designed for learners at the start of the school year. It is fairly orderly and neat. It was designed before the learners ever entered the room. Therefore, the design did not take into account what the learners want the room to be. That's a problem! So...the question is: In what way can we design the classroom to meet our needs as learners?
Step 1: Talk To An Expert
Mr. Jonathan Wehri, an architect working with LSC Design came to look at the classroom and help devise a plan of action to get the students involved in the process of redesigning their work space. He suggested using Design Thinking to guide learners through this process.
Step 2: Gathering Stories
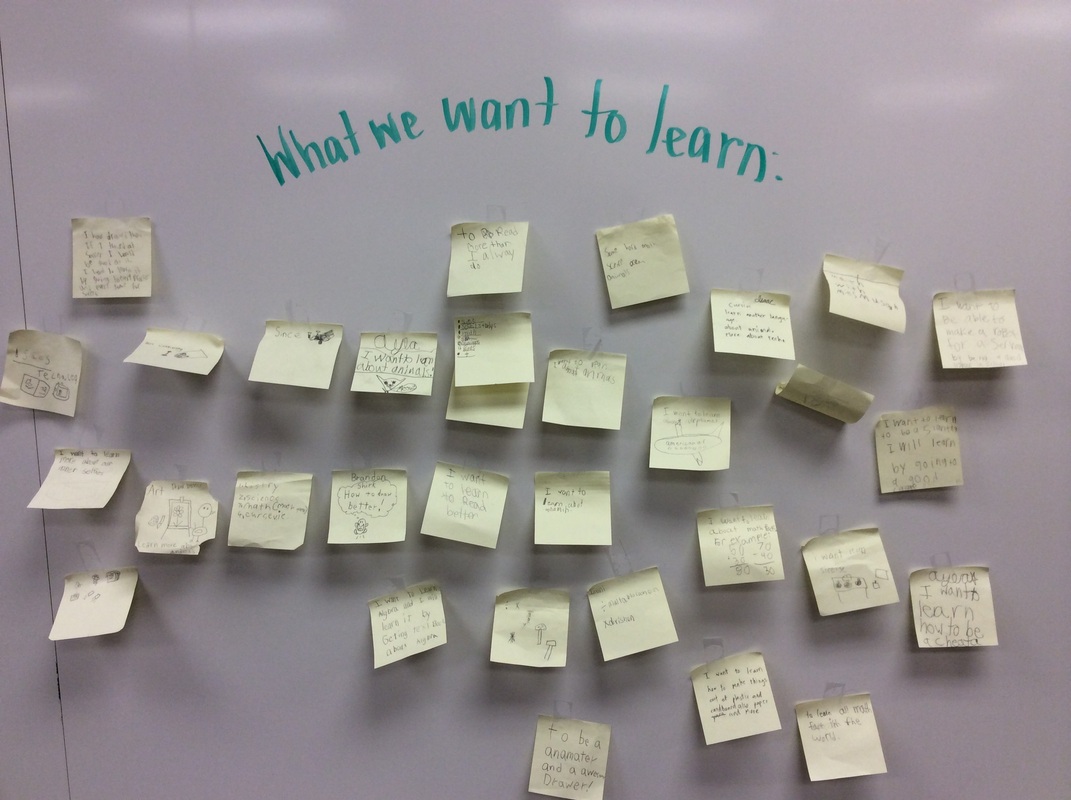
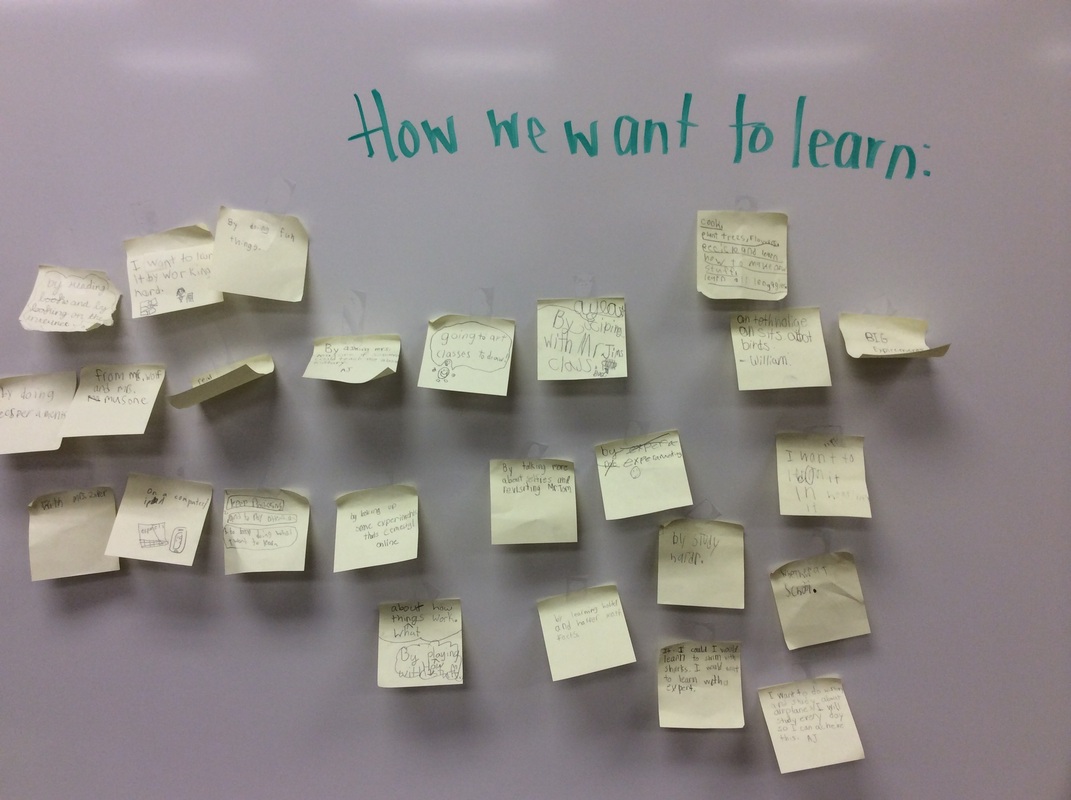
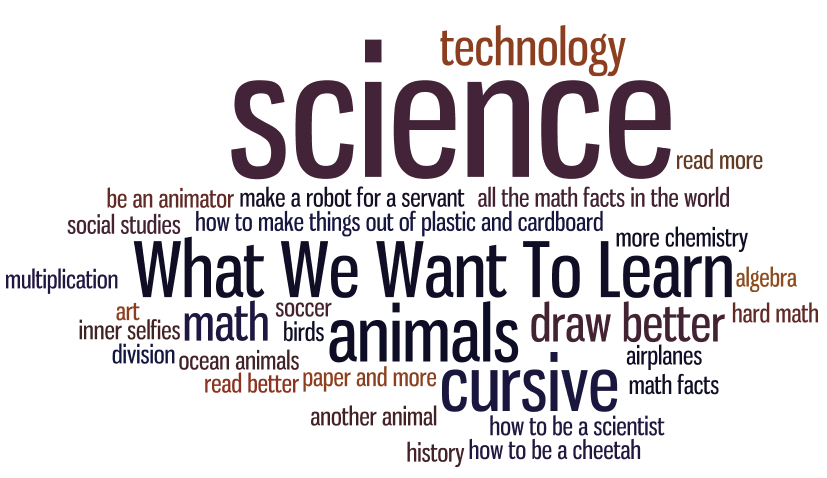
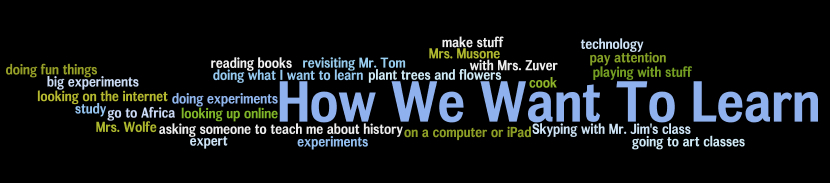
Here, we brainstormed what we wanted to learn and how we wanted to learn it.
What We Want To Learn How We Want To Learn
|
|
Step 3: Looking For Patterns, Identifying Categories
We discussed themes that emerged and categorized the types of spaces we would need in order to do the things we want to do this year.
Types Of Spaces We Need:
We took time to dream about what we thought these spaces could be. What if...?
Types Of Spaces We Need:
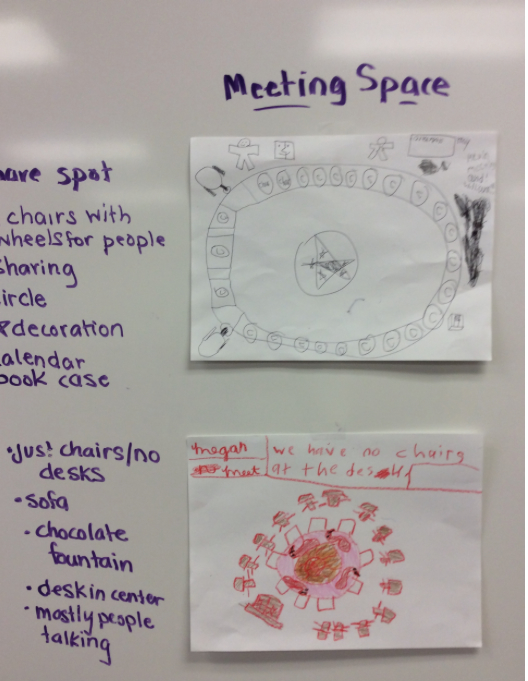
- Meeting Space (Many of us want to learn from others)
- Quiet Space (Sometimes we want to be in a place where it is calm and quiet so we can work)
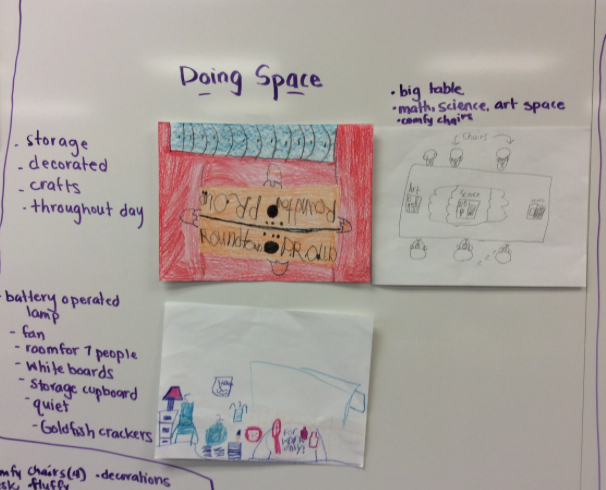
- Doing Space (We want to conduct experiments, build, create, and etc.)
We took time to dream about what we thought these spaces could be. What if...?
Reflections: Taking Time To Consider What We Want In A Space
After we dreamed about and sketched out a room space, we took time to reflect upon our thinking through blogging.
Blogging Examples:
Catie's Blog: Quiet Work Space
Megan's Blog: Meeting Space
Kasear's Blog: Doing Space
Blogging Examples:
Catie's Blog: Quiet Work Space
Megan's Blog: Meeting Space
Kasear's Blog: Doing Space
Step 5: Looking Closely At Our Ideas
After blogging about our ideas and commenting on what others had to share, we shared our ideas collectively. We took notes on what was shared and then synthesized what we shared.

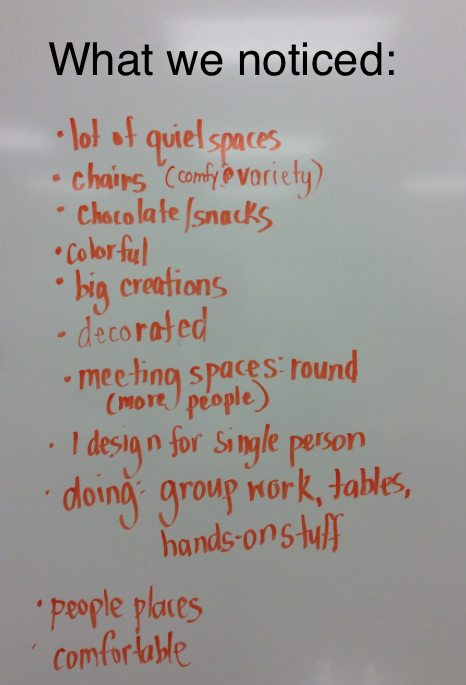
Step 6: Reflection
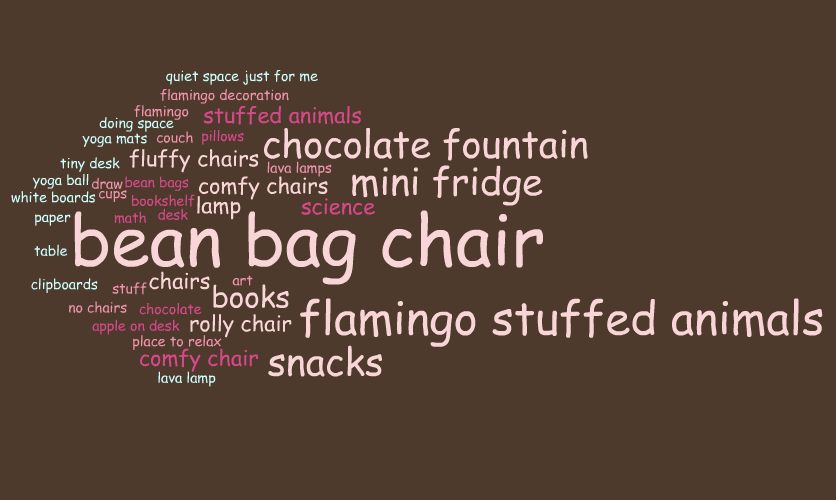
As we looked at the elements of our spaces, we independently wrote down what we thought were the most important things to include in our room redesign. The word cloud illustrates our desires.
Step 7: Talking To An Expert
Courtney Parfitt, an interior designer, from SAA Architects, came into our classroom. She talked to us about the work we have done and offered suggestions for moving forward.
Some questions for us...
She sketched out a floor plan as a starting point for us.
Some questions for us...
- Did we envision our meeting space to be a place where we worked in a small group or would it be a place the entire class meets? We said both.
- Did we envision our doing space a place where we worked on our own or in groups? We said both.
- Ms. Parfitt suggested that the back corner of the classroom, away from the door be used as a quiet space.
- Perhaps we can add shelves for our doing space to house all of our "doing stuff."
- AJ suggested a meeting space be in the back of the classroom and Megan suggested it be in the center of the room.
- Julia suggested that a corner be used for the quiet space.
- Perhaps a barrier could be used to make the quiet space more private.
- Perhaps there could be pockets of quiet spaces around the classroom.
- Ms. Parfitt suggested calm colors for our quiet space. We brainstormed blues, greens, pale yellows, and pale pink. Artwork might be of the outdoors and possibly a sunset.
- Bold colors, such as red and orange can be used for the doing space.
- We might need to create ground rules to be followed for the quiet space.
She sketched out a floor plan as a starting point for us.

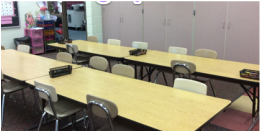
Step 8: Test & Reiterate
We rearranged the classroom based upon what our needs were, our design ideas, and what we learned with Ms. Parfitt. We started to think "outside the classroom box."
Design Elements:
Things To Think About At This Point:
Design Elements:
- Quiet space (relaxing) in the back corner of the room. A table separates that from quiet space with chairs. We think we are going to add artwork on or above the table to separtate the spaces.
- Doing spaces on both sides of the classroom, defined by two rectangular tables put together. Ashton thought the spaces should be symmetrical.
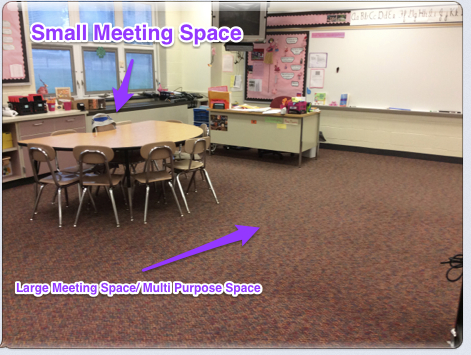
- The kidney-bean table is in the middle of the room with a large open area on the floor in front of it. These are both meeting spaces.
Things To Think About At This Point:
- We still want the chocolate fountain, but currently don't have one.
- We want a mini fridge to house snacks and drinks.
- We would like bean bags and yoga balls. We can ask Mrs. Levine if she has an extra yoga ball for us to test.
- We need space to house our "doing stuff."
- A rug could be added to define our meeting space on the floor.
Step 9: Further Reflection
After we worked with Ms. Courtney Parfitt, we decided to test some of our ideas. We created two doing spaces, one on each side of the room, a large meeting space in the middle of the room, and quiet spaces in the back of the room. We worked with that design and determined a couple of things.
What we liked:
Some roadblocks we faced:
What we liked:
- We could go anywhere we wanted to (we got rid of name tags on chairs).
- We liked that there was a large space on the floor.
Some roadblocks we faced:
- We didn't know where to put our "stuff."
- We might want more chairs in our meeting space.
- We lacked "comfy" chairs.
Step 10: Meeting With Mr. Miller
We spent some time talking with our principal, Mr. Miller. He talked to us about available furniture at Roundtown, some possibilities, and even some roadblocks we need to think about.
Our conversation is documented below.
Our conversation is documented below.
Step 11: Mr. Jonathan, From LSC Design Talks To Us
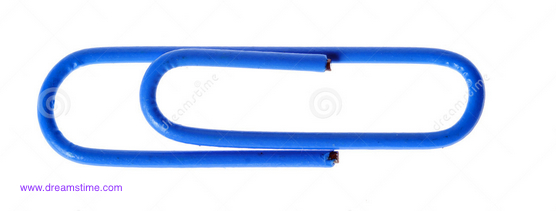
What does a paperclip have to do with architecture?
We found out when Mr. Jonathan visited us. We began our meeting with some observations about our first go at redesigning our classroom. He asked us questions about space, our vision, what we needed to function effectively, and what was currently working. From that, we began to think a bit differently about the spaces and how they could be used. That's where the paperclip analogy came in. There are many different uses for paperclips...we thought of more than 20 in just a minute or two. He challenged us to think of spaces like paperclips, perhaps they can serve different purposes under different circumstances. Huh...that made sense! Our conversation is documented below.
We found out when Mr. Jonathan visited us. We began our meeting with some observations about our first go at redesigning our classroom. He asked us questions about space, our vision, what we needed to function effectively, and what was currently working. From that, we began to think a bit differently about the spaces and how they could be used. That's where the paperclip analogy came in. There are many different uses for paperclips...we thought of more than 20 in just a minute or two. He challenged us to think of spaces like paperclips, perhaps they can serve different purposes under different circumstances. Huh...that made sense! Our conversation is documented below.
Step 12: More Room Arranging
Doing Space
Step 13: Testing, Redesign, Iterate
I Like, I Wish, What if?
We took time to reflect upon our room design, what we liked and what we wished for. We used that to work through our room design so that it becomes exactly as we wish it to be.
We really like the way our furniture is arranged and are working on our final iteration of our project.
These are our "What ifs?"
We split up based upon interests and then took the conversation into Schoology. Below are excerpts from our conversations there.
We took time to reflect upon our room design, what we liked and what we wished for. We used that to work through our room design so that it becomes exactly as we wish it to be.
We really like the way our furniture is arranged and are working on our final iteration of our project.
These are our "What ifs?"
- Class Pet
- Yoga Balls
- Quiet Cave
- Idea Wall
- Drawing Space
- Making Books For Our Library (Hard Copy & Digital)
- Hanging Mobiles & Models From Ceiling
- Snacks
We split up based upon interests and then took the conversation into Schoology. Below are excerpts from our conversations there.
Taking Action
After our online conversations, we discussed our thinking face-to-face and began to take action.
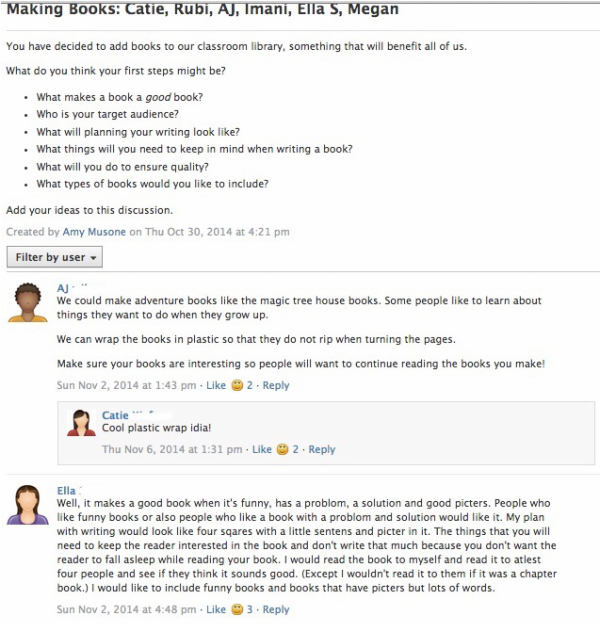
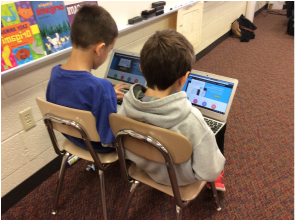
Making Books Group:
Yoga Ball Group:
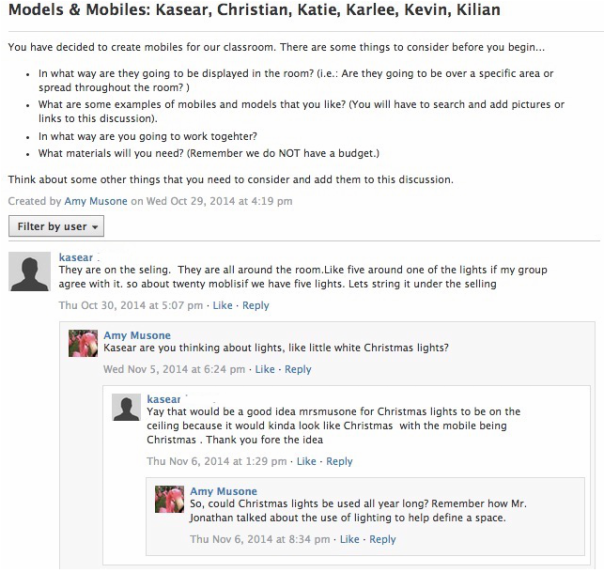
Mobiles & Models Group:
Idea Space Group:
Class Pet Group:
Cave Space Group:
Making Books Group:
- They decided that they wanted to start out writing narrative books and brainstormed a list of topics they'd like to write about.
- Next step is to work with our literacy coach, Mrs. Thomas to storyboard.
Yoga Ball Group:
- This group began to draft their letter to Mrs. Levine asking to borrow a few yoga balls for a couple of days to test them out. They need to remember to begin their letter with a compliment, something that was brainstormed when working with our Granny, Mrs. Sheffer.
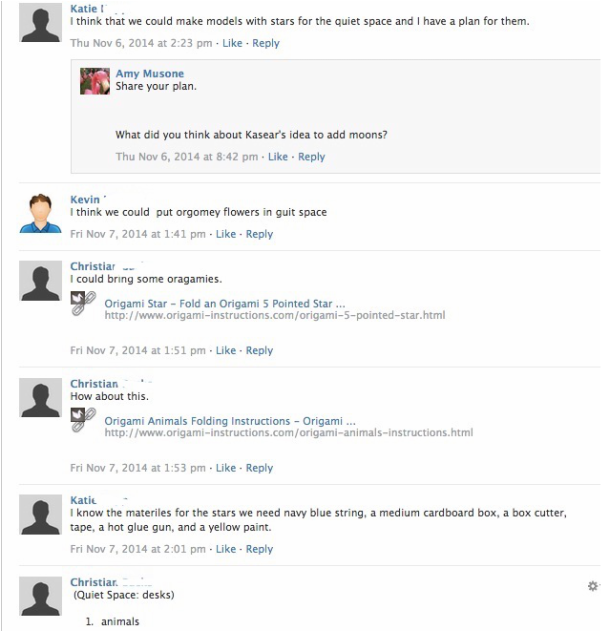
Mobiles & Models Group:
- They decided they didn't want to have model planes and cars hanging from the ceiling like they originally thought they did.
- They want to create origami stars for the quiet space and make a moon. They also want to add twinkling lights to the space to help define it.
- They thought they would work on the quiet space first before moving on to other parts of the room.
Idea Space Group:
- This group decided to make half of our white board the idea space. They created a sign to help define the space.
- Their next steps will be to work on creating a drawing space/wall or creating private work spaces with our three desks.
Class Pet Group:
- These kids decided a ZuZu pet would be a good pet for our class as we are not allowed to have real critters in the classroom. After working with Mrs. Sheffer, they realized that caring for a ZuZu pet would help build responsibility.
- They found two ZuZu pets they liked and took a survey to determine which pet would be our class pet. Shamrock, the green ZuZu pet won.
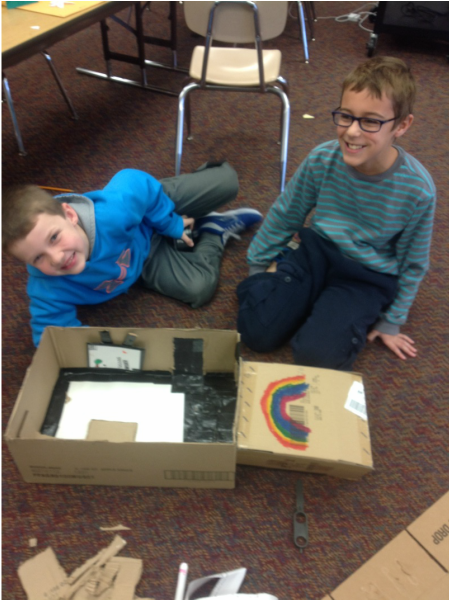
Cave Space Group:
- This group toyed with the idea of creating a ribbon wall using ribbon and ceramic planks. Some of the group members wanted to use cardboard for more privacy, but decided against it.
- They began to test their ideas out and are ready to build.
Action!
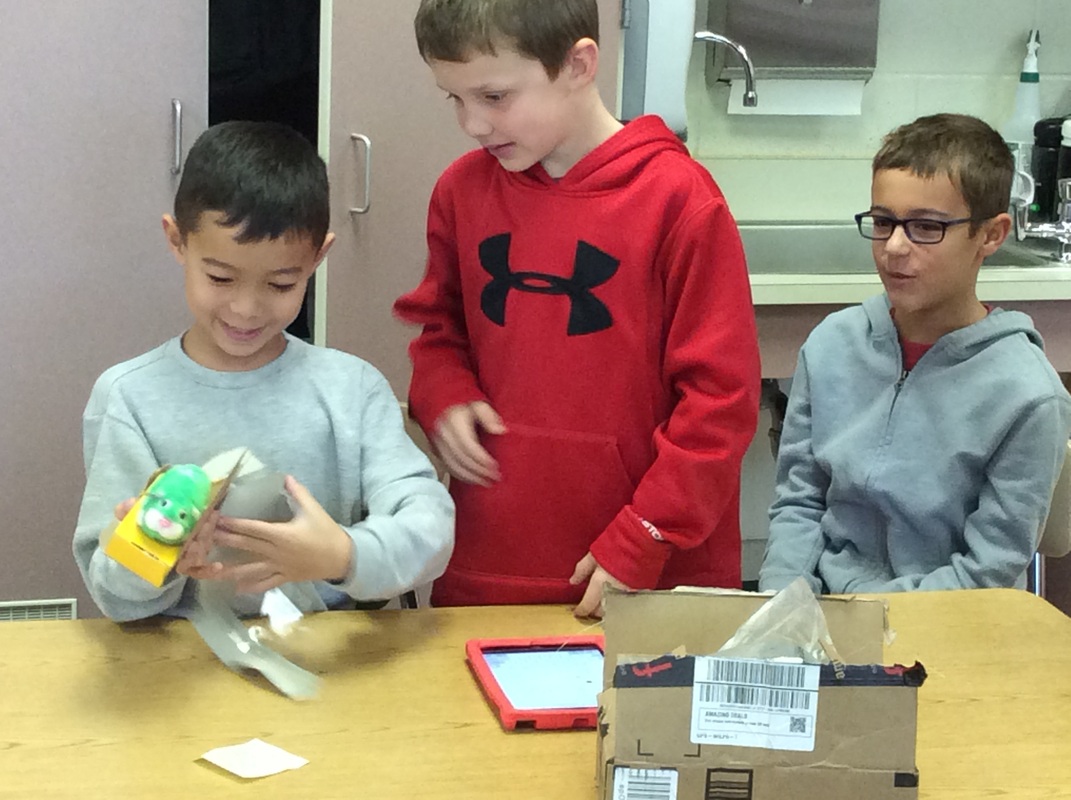
The ZuZu Pet group gets acquainted with Clover. They read the directions and learned about the different operational modes.
Figuring out how to make origami stars for our quiet space was tricky.
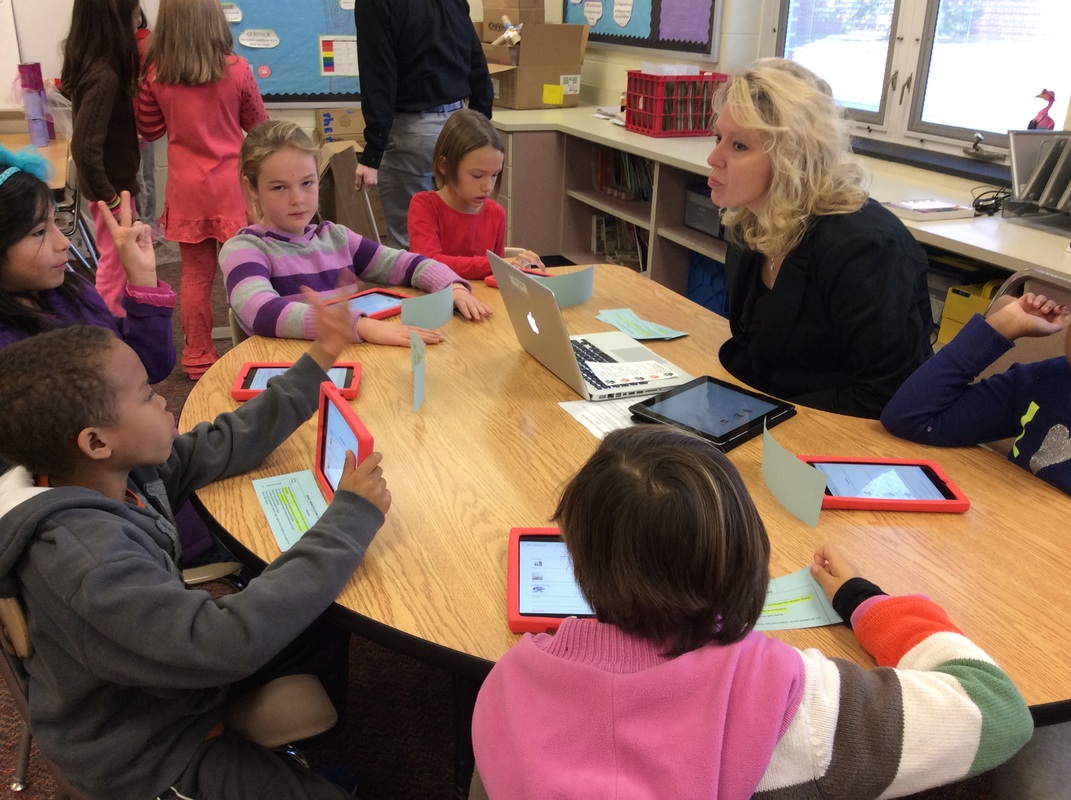
Everyone in the making books group wanted to write some sort of narrative story. Our expert, Mrs. Thomas guided us through the process.
|
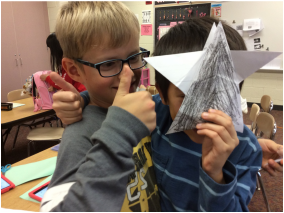
It was tricky, but NOT impossible. Now for the origami paper!
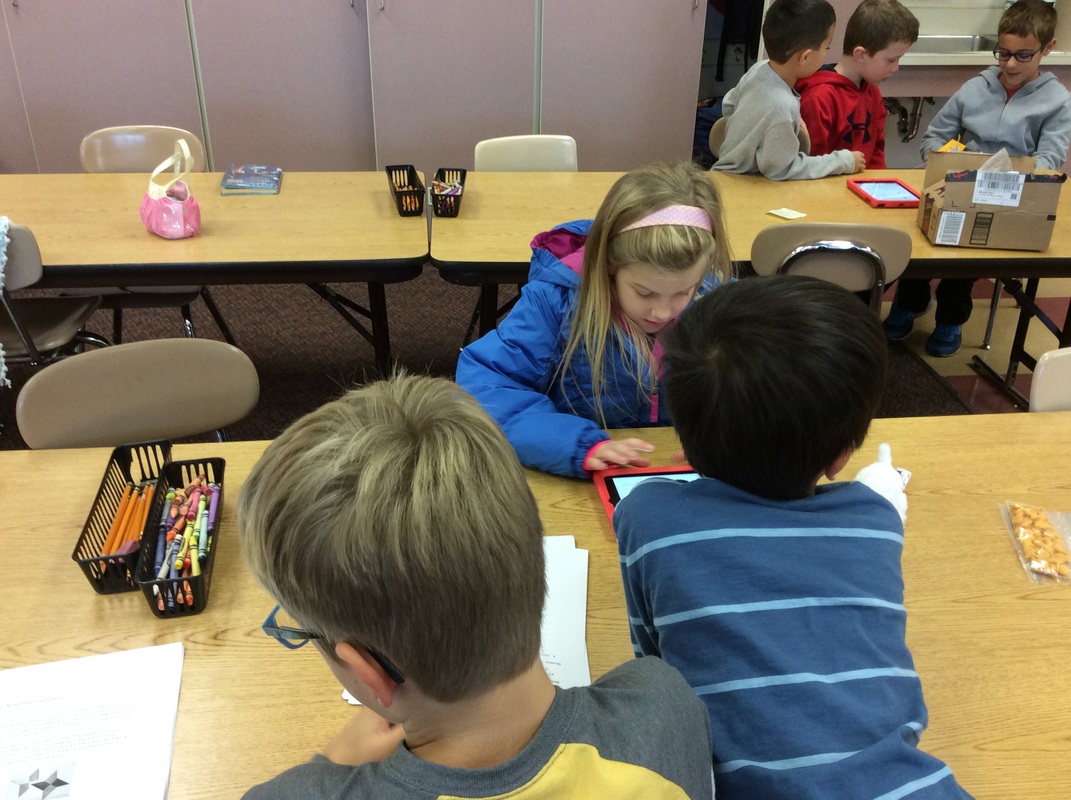
Getting ready to brainstorm ideas for our drawing space.
|
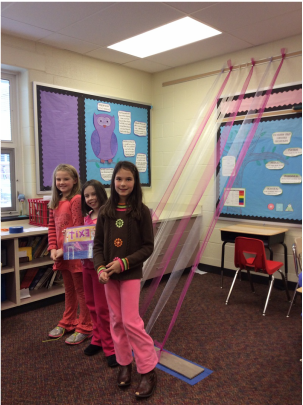
The cave is being constructed!
Our Classroom...We're Almost Done!
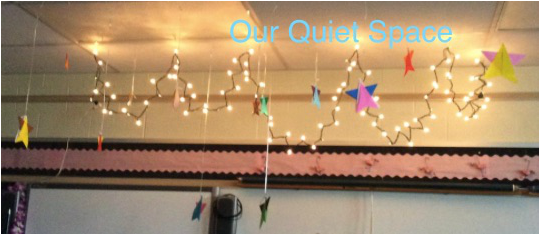
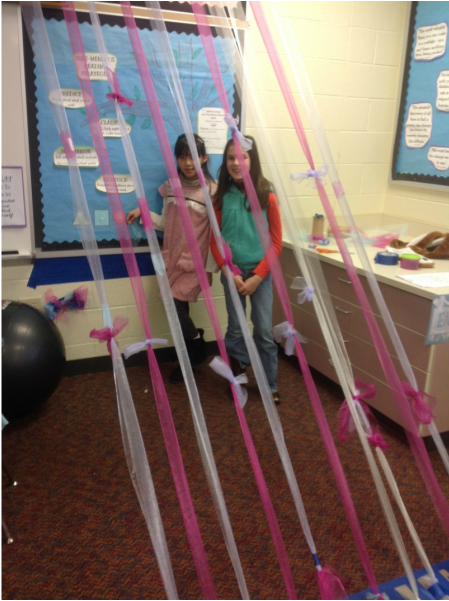
Our Quiet Cave
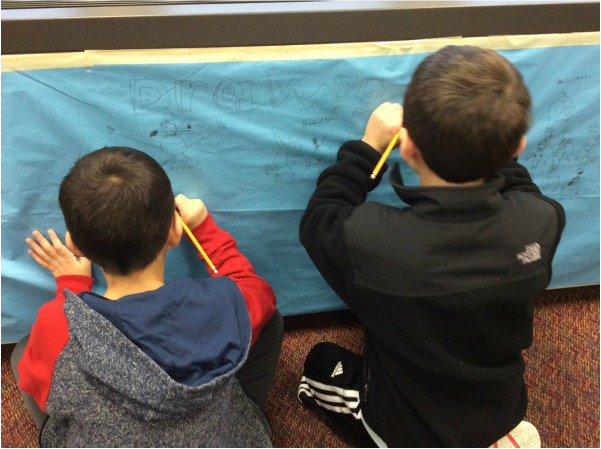
Drawing Space
Our class Zu Zu pet, Clover's space
